Project-oriented and Emergent Themes
This is the last part of my course, we were introduced to programming, micro:bit, 3D design and printing. As for programming, I heard about it but never thought I would get involved with since computers were not my favourite. I liked how jari simplified it as soup recipe. When I coded him to move to his usual teacup and biscuits, this procedure showed us how simple yet sensitive programming is, if you missed one small detail the whole program will not function appropriately. Unfortunately, I don't have a picture of Jari when he was a robot though it would have been a very beautiful picture. I wish if any one of my classmates has this picture, please send it to me I will really appreciate it.
Me and micro:bit has a long story between us. It started when Jari gave me the first micro:bit I've ever seen, I didn't even know what is this or what it does? or why he is giving it to us? When I returned home I googled first what is a micro:bit and found out what was it and why do we use it. I started to follow the steps in this coloured catalogue. I wasn't that interested in it since I had no idea about coding though I heard about the importance of coding for kids and how it affects their thinking skills.
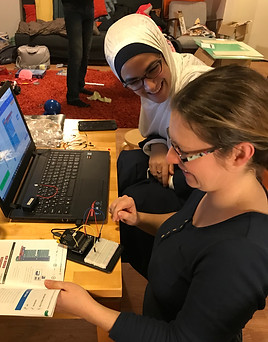
But in our problem-solve case 1 course, we had to work with micro:bit since it was a requirement that the students should learn. Of course, we can't teach them something we are not familiar with, so we had to make several meetings with my group Lulu, Chunxiao, Diego and Larissa at Dora's house in order to improve our skills. We were guided by Petteri Dora's husband and Diego, they were the brains in this field.
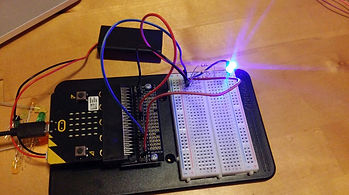
Me and Dora were excited to use the kit that Jari gave to us and started to follow the directions in the catalogue, but we aimed high and wanted to code a fan with a motor as our first task. The result was frustrating for the first attempt since in circuits and breadboard you can't find what is wrong from the first time, the malfunction is hidden in a disconnected or wrong positioned wire or malfunctioned battery. But Petteri was able to find the problem. After practising for hours we reached the conclusion that if you want to teach any student about micro:bit and coding we should start with simple tasks as connecting a LED light and sensor then gradually add tasks like sensor, motor and fan that needs a resistor too. That way the student will not find hard as it looks like. Never start with the fan even if they were excited. Using blocks in coding was the easiest way to code the micro:bit. Yet working was micro:bit was fun and challenging, it takes a lot of time to prepare one circuit if you were a rocky but once you get used to it you will be able to connect everything faster. I would like to teach my kids how to code micro:bit, in fact, I'm thinking to buy one for them too. A final point to be mentioned that using micro:bit with a breadboard is much easier and practical than using it with alligator clips, these were a nightmare to me.
Micro:bit experience helped in applying collaborative learning, were we able to work with each other in harmony. We managed to understand each other point of view and try to accept the differences. Each one of us had a task and we were completing each other.


Dora
Useful tip: always start coding with simple codes then understanding all the blocks functions you can start with making it more complex. The same case with building the circuit, start with LED lights then add a sensor, later add the motor with the resistor.

3D designing and printing are one of the most exciting sections in this course. We were introduced to Fab lab which is a small digital manufacturing working area (fabrication laboratory) that complies with open innovation concept developed by MIT in the United States. In Fab Lab it is possible to design your own product or hardware from the scratch. Fab Lab Oulu operates within the University of Oulu. I saw the first 3D printer in my life in this lab. I designed a shape on Tinkercad with my family members' names that I can hang on the wall and printed out via the 3D printer. There are a lot of software that you can design 3D objects on it, but not all of them are free, you have to pay in order to get professional 3D figures. While searching I found this website Thingivers it has more than 970,800 designs for printing. In Rajakyla project the students printed out some furniture items for their room, like tables or chairs. Some of the printed objects faced some malfunction in printing which leads to a different outcome. Some of the students already know how to work on Tinkercad, others didn't.
Useful tip: Always be careful when you are designing your 3D objects and make sure that they are all attached to each other (grouped), or you will have annoying separated parts.

As for laser cutting, I downloaded Inkscape to my laptop to design the objects I wanted to cut. Designing on this software is not so complicated yet it needs practice to get used to it and you can't acquire all its options from one session. I was very happy to see the outcome of my designs, sometimes I used already made designs especially when I was cutting boxes. I logged into http://festi.info/boxes.py/ this website has different types of boxes design that you can choose from some are practical others aren't. I engraved my daughters' name on the box. You have to know what type of materials you are using 9 acrylic 3mm or 4mm, plywood 3 mm or 4mm). Challenges I met in laser cutting is when you are cutting things other than letters and pre-designed objects, you have to trace the path and sometimes scan the figure couple of times to choose one of the scanned paths that you like. It also differs if the designed thing is in black or white or coloured. I tried to cut a frame but it wasn't black so it took me from 11:30 am till 3:30 to cut it out with the help of Fab lab team, without them I wasn't able to do it at all.
Designing, preparing, tracing paths checking the stroke and uploading takes a lot of time. . Now I'm able to work on 360 Fusion laser cutter, I'm able to upload files to it after preparing the settings whether the force or the speed of cutting, I know how to calibrate the jog of the laser cutter and make sure that the focus is appropriate then cut what I want.
A useful tip: Always make a trial and cut on a cardboard to check how it will be before cutting on the original material whether plywood or Acrylic.


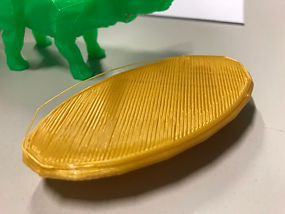
My students cutting their room for Masa
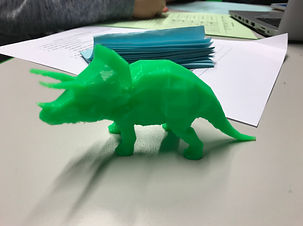
This is Masa the dinosaur that needs a room
The final section games and gamification. Everybody loves games; children and even adults. If games were used in learning, then the children will love learning and won't get bored with it. We were introduced to Minecraft for education, a game that students get involved in it and move in its virtual world with characters of their choice and names they have written. Minecraft idea was not new to me, I used to play Counterstrike when I was 16 years old. Thus the idea of moving around and exploring the area and finding treasures is the same, killing your friends with different types of weapons is the difference between Counter strike and this version of Minecraft. What I liked is the idea of being educator inside Minecraft, that way you can control your students inside the game; choosing what type of treasures they will find and even move the students to where I am standing or Vice versa. I wanted to bring Dora to my place which was in the beginning of the game but I accidentally moved another classmate, he/she suddenly found himself/herself in the beginning of the game after reaching a far level. Till now I didn't know who is it. But I'm sure if I was a teacher in the class I will know the nicknames that each student use, that way I will be able to control them better. After playing for a while the game suddenly stopped and logged us all out of it, this was disturbing since we lost all our progress in the game, I think the reason was a bug or the internet connectivity in the class.

I enjoyed playing with the robot BB8, this is the first time for me to control a robot and from my own phone. It had a yes and no button as if it was talking to you. Also when you showed me how to code the second robot and launch it in front of me. It is amazing how coding is simplified to be understood by doing it directly on the robot. In addition, the size of potentials that the teachers of these days have, and how they can create an interactive motivated lesson with the help of all these technological gadgets.


